Showing posts with label Tutorial. Show all posts

Sunday, January 1, 2012

Chenille

One of my favorite projects of 2011? I'd say yes. This was definitely in the top 10!

A very good friend of mine had a baby girl, and I knew I wanted to make her something special. I wanted to do something different than I've ever done, so that I could learn a new technique. I came across a great tutorial on Pinterest (here) for making 'Heirloom Cheenille Baby Blankets.' It was just the 'cool & unique' that I was looking for!Whew! It was a labor of love, but the outcome was fabulous. I honestly can't wait to make another! I was prepared, yet still shocked at how much thread it took to sew so many lines. This quilt took me as long to make (actually even a little longer) than most of my pieced infant quilts.
Once all finished and given it's first wash and dry, the texture of this blanket is DELICIOUS! No other word can describe it's yumminess!Making one of these quilts is not difficult, just time consuming. If you can sew somewhat of a straight line, than whipping one up is easy as pie. I'd give it a 'Beginner Sewer' rating, as long as said beginner can be patient and avoid going cross-eyed from sewing line after line!

Monday, November 1, 2010

Gathered Flower Purse

When I saw this purse and tutorial over at U create a few weeks ago, I knew I just HAD to make one!

So, here is my version of the Gathered Flower Purse...
and a little closerand even a bit closer shot of the flower.When I first saw the tutorial, I immediately knew that I wanted to make a 'fall version'. A houndstooth (is that spelling right?) pattern was what I first had in mind, but I couldn't find one I liked, so I ended up with this suiting material for the base of the bag. I used black pleather and jersey for the big ole' flower. I think the cute polka-dot interior of the bag is my favorite!
And because I just got back from an amazing week-long cruise with my family, here is a fun shot of me modeling my cute new purse!!

Saturday, August 21, 2010

The 'Perfect Hooded Towel' Tutorial

Items needed:
Bath Towel
Hand Towel
Coordinating Ribbon
Thread
Sewing Machine
Pins
Rotary Cutter/Ruler or Scissors

Step 1: Cut the hand towel in half. (1/2 of the hand towel will become your hood. Set the other 1/2 aside for another towel or project.)
Step 2: Using one side of the hand towel you cut - Place the WRONG side of the towel on your work surface and fold the finished edge back about 1/2" to 1" wider than your ribbon. (this will become the decorative border for your hooded towel.) Pin the ribbon in place and sew a straight stitch down both sides of the ribbon.
Step 3: Fold the towel in half so that the ribbon folded in half matches up. Sew the raw edge to itself using a 3/8" seam allowance. Zig zag or serge edge to avoid fray.
Step 4: With the WRONG side of your large bath towel facing you, mark the center of one long edge with a pin.
Step 5: Match the center point of your large bath towel with the seam of the hood you just sewed (which is the center of the hood) RIGHT sides together and pin.Hint: Place your pins on the hood side, rather than the large towel side...so exactly OPPOSITE of what the picture shows. I had to move mine! ;)

Step 6: If there is anything at all tricky about this towel, this next step would be it, but its really not bad. - Make a pleat in your hood like I've shown in the photo, about an inch long. PIN in place.
Repeat the previous step and make one more pleat.
This is how it should look from the top -
Step 7: Repeat step 6 and make two identical pleats on the left side of the hood. Pin in place.
Step 8: Sew the hood to the towel about 1/4" from the edge. Remove pins and patyourself on the back! You just make the 'Perfect Hooded Towel!'

Hooded towels make for great baby gifts. The color/ribbon combinations are endless. I have one for each of my boys and use them all the time. Hopefully you can now enjoy making some of your own!

Monday, July 19, 2010

Denim Bracelet Tutorial!

I am always so inspired by all the tutorials I see out in blogland. This tutorial is painfully simple, but something I came up with all on my own, (and I think it's pretty cute ;) so I thought I'd share!
So, It's kind of cute and cheezy and cool all at once! A fun little denim bracelet that can be worn with almost anything! The idea for the bracelet formulated after I had altered some denim pants into shorts. I had cut the seam off first and tossed it aside. Later I came back to it and thought...huh, that might make something kind of cute! So...on with the tutorial. (This is SUPER simple, and would be a fun project to do with your tweens or teens.)

Denim Bracelet Tutorial:

First you will need:
*an old pair of denim pants or shorts
*a good, sharp pair of scissors
*a button
*a ruler
*sewing machine

Step 1: Cut off a seam from your scrap denim. I like to turn the denim to the wrong side so that I can use the seam as my cutting guide. Cut just to the right of the folded/stitched seam.

Step 2: Determine how long you want your bracelet to be. I have found that most adult bracelets are somewhere between 7 to 8 inches long. I cut mine at 7.75" Cut seam to wrist size.
Step 3: Add a button hole to one edge of the cut piece. Make sure your button hole is large enough for your selected button.
Step 4: Add a button to the side of the denim that does not have the button hole.
Make your slit in the space you created your button hole, slip your button through the hole, and VOILA! You have yourself a cute, trendy little denim bracelet! Because of all the fun buttons available, and all the different widths of denim seams, the possibilities are endless! Here are just a few of the bracelets that I've made. I've already given a bunch of them away too. I wore mine one Sunday to church, and all the teenagers thought it was super cool, so I hooked them up!

I think the one frayed edge gives it that grunge charm that people pay so much for today. Kind of fun!

Friday, March 5, 2010

Zipper Rosette Tutorial

So...this is the first tutorial I've ever tried to make. I'm a little nervous. Hopefully the instructions are clear and you'll want to make some of your own!

How to make a Zipper Rosette...

Supplies Needed:
-zipper
-upholstery thread or embroidery floss & needle
-pliers (are helpful, but not always necessary)
-scissors
-coordinating (with your zipper) felt
-hot glue gun

Step 1
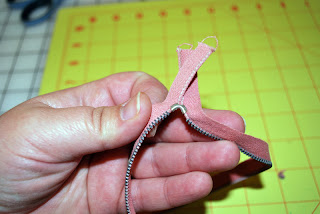
Take your zipper completely apart. This is where a pair of pliers can come in handy. Some zippers are just stopped with glue that can be forcefully pulled apart, or thread that can be sewn, but some have this little metal stopper that you can see above. To get them off I use a combination of pulling with pliers and yanking the zipper apart. As you can see in the next picture, all of the pieces don't always come off 'cleanly', but it shouldn't affect the final outcome.
*Note - I like to save the zipper pull to glue into the center of some of the rosettes, but its up to you.
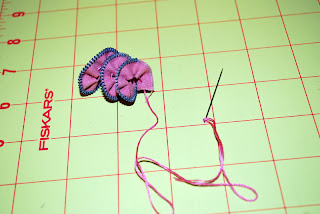
Step 2Using embroidery floss, or some other very strong thread, knot the end of the floss and begin a running stitch about 1/8th of an inch from the bottom of a zipper half. I've found that a longer stitch is better (which is the main reason I do this by hand rather than with my sewing machine.)

Step 3Once you've sewn along the entire bottom of the zipper, pull your thread to form gathers. How tight you pull your thread is up to you. I've found that it is a lot easier to work with in the next few steps if you don't pull it as tight as you can. You'll want a little 'give'. Tie off your thread and snip.

Step 4This is the hardest step to illustrate, so I'll do my best to walk you through it. Starting with the edge of the zipper that you started your running stitch on, roll the zipper onto itself. As you are rolling, pull the raw edge from the beginning of the zipper (just a bit) through the hole in the middle. (This will make more of a finished middle and hidden raw edges.) Continue arranging the rosette by making each layer peak out from the previous.

Step 5Cut out a piece of felt that is close to the same size as your rosette. (Yep! This is the easy step!)

Step 6Liberally apply hot glue to the bottom of your rosette, and attach it to the piece of felt. Make sure when you glue it down to the felt that both the middle of the rosette and the very end raw edges are tucked under the rosette and glued down.

This is the point that you can add some 'bling' to the center of the rosette if you choose. (I like to use the zipper pull, but you could add a purl or gem, or something of the sort.)

Step 7Cut away the excess felt from behind the rosette.

You are now DONE!! Finish the rosette as you please. *I've added leaves to a few, but they are definitely cute enough to stand alone on their own too.* Attach to alligator clips, bobby pins, etc.!


Hopefully this little tutorial has been helpful! Happy crafting!